Oh macarons...you are so finicky! But I love you anyway!

This cookie is not hard but takes patience...some days it works...some days it doesn't...Don't make them while it's raining or if you have someplace you have to be...or if you're in a bad mood...HA!
I'm serious about the rain...humidity effects how the cookies "set" which makes them not rise correctly...
This cookie is a work in progress and may not ever be perfected...but I'll keep trying.
This recipe uses the French method for making meringue not the Italian. It has been said that the Italian method makes a more stable meringue but I haven't had any problems with the French method.
The correct way to make macarons is to use the ingredients in weight and not volume. Thus, this recipe is in weight...
You will need a kitchen scale! You can find one on Amazon for under $20. You will also need a food processor, sifter (not the ones that look like a cup...the almond meal gets stuck under the mechanics!), beaters with a whisk attachment and at least 2-4 days to make these cookies!
Here is what you will need for the lemon macarons:
- 120g almond meal
- 200g powdered sugar
- 100g egg whites (at room temperature...this is crucial!)
- 1/2 tsp cream of tartar
- 30-35g granulated sugar
- food coloring (the normal food coloring has worked fine)
For the filling:
Lemon Curd! (The more "tart" the better in my opinion)
For the filling:
Lemon Curd! (The more "tart" the better in my opinion)
1. Start by separating eggs white out one at a time. You will need to separate them one at a time in a bowl because how terrible would it be if you got yolk in there with you other egg whites...you would have to start all over!
Once one egg is separated, place them into the scale, then move onto the next egg until you have the desired amount.
Once one egg is separated, place them into the scale, then move onto the next egg until you have the desired amount.


You may have to spoon out a bit of egg to get the right amount.
2. Age your eggs! Cover them in a bowl, pressing the plastic wrap into the top of the egg whites so they do not form a skin and put them in the refrigerator for 1-4 days (no more than 5 days!)

3. On the day you want to actually make your cookies, take the aged eggs out of the fridge and allow them to come to room temperature. Having them room temperature will make them more stable for the meringue.
4. Part of the time you are waiting on your eggs, you can get EVERYTHING else ready to go. All your ingredients, and such need to be ready to use immediately!

Line your baking sheets with wax paper (I add a very LIGHT spray of cooking spray...you should not really be introducing any extra moisture or oil to your cookies, but they tend to stick BAD sometimes! - although under baking can make them stick - and the spray did help a bit)

I do not have piping bags so I use a large Ziplock bag and cut a small hole in the corner when ready to pipe. Placing it in a large cup (YUM Rudy's BBQ) will allow you to fill the bag with both hands)
5. Go ahead and weigh out your almond meal and powdered sugar. Once weighed, place in the food processor.

6. Blend until powdery and set aside.

7. Weigh out the rest of the ingredients...get your bowl for mixing meringue and your beaters with the whisk attachment .
8. Once your eggs are at room temperature, you can put them into the bowl, add in the cream of tartar...and on a slow-med speed begin to whip them.

9. You will continue to whip them for several minutes until they are foamy.

10. Add in your granulated sugar immediately and continue to whip until the eggs are white.

11. Add in your food coloring...how much you add depends on how deep you want the color. Just remember the color lightens a bit when you add in the dry ingredients.

12. After adding color (which by the way is totally optional...they will come out a light tan color without color) whip egg whites in a Med/High speed until you have stiff peaks.

NOT ready! Keep going!

Perfect!

If you keep whipping after this you will have "butter" YUK!
13. YEAH you have French Meringue! You can begin to put your dry ingredients into the meringue and FOLD and PRESS them in. This is where it gets tricky! You want to flatten out your meringue a little but not too much or your cookie will be too flat. You do not want to under mix and you do not want to over mix. Both result in a tasty but ugly cookie! There is a TINY TINY window where the batter is just right. You should have a lava consistency (and it gets runnier the longer you stir - Trying to pipe out runny batter is very disheartening!).
If you have used a food processor on your dry ingredients you may not need to sift it...however the smoother your dry ingredients, the smoother the top of your cookie will look.
Some suggest adding in the ingredients by 3rds, others by half and still others think the best approach is to add it all in at once. I have tried putting it in by 3rds and found that it was really easy to over mix...so with the second batch I tried all at once and it seemed to work a bit better. This is where it's a learning process! Try and try and try again!

Nice lava flow!
14. You can now fill your piping bag and pipe out small circles (about an inch) - Some suggest drawing a template and placing it under the was paper...I didn't.
There are a few ways to pipe...you can pipe in clockwise circles from the outside in, or place the entire tip of your piping bag down and pipe up over the top of the tip...you can move the tip to the side, you can flick it up at the end...so many options...use whatever method works best for you. I used the clockwise circles.
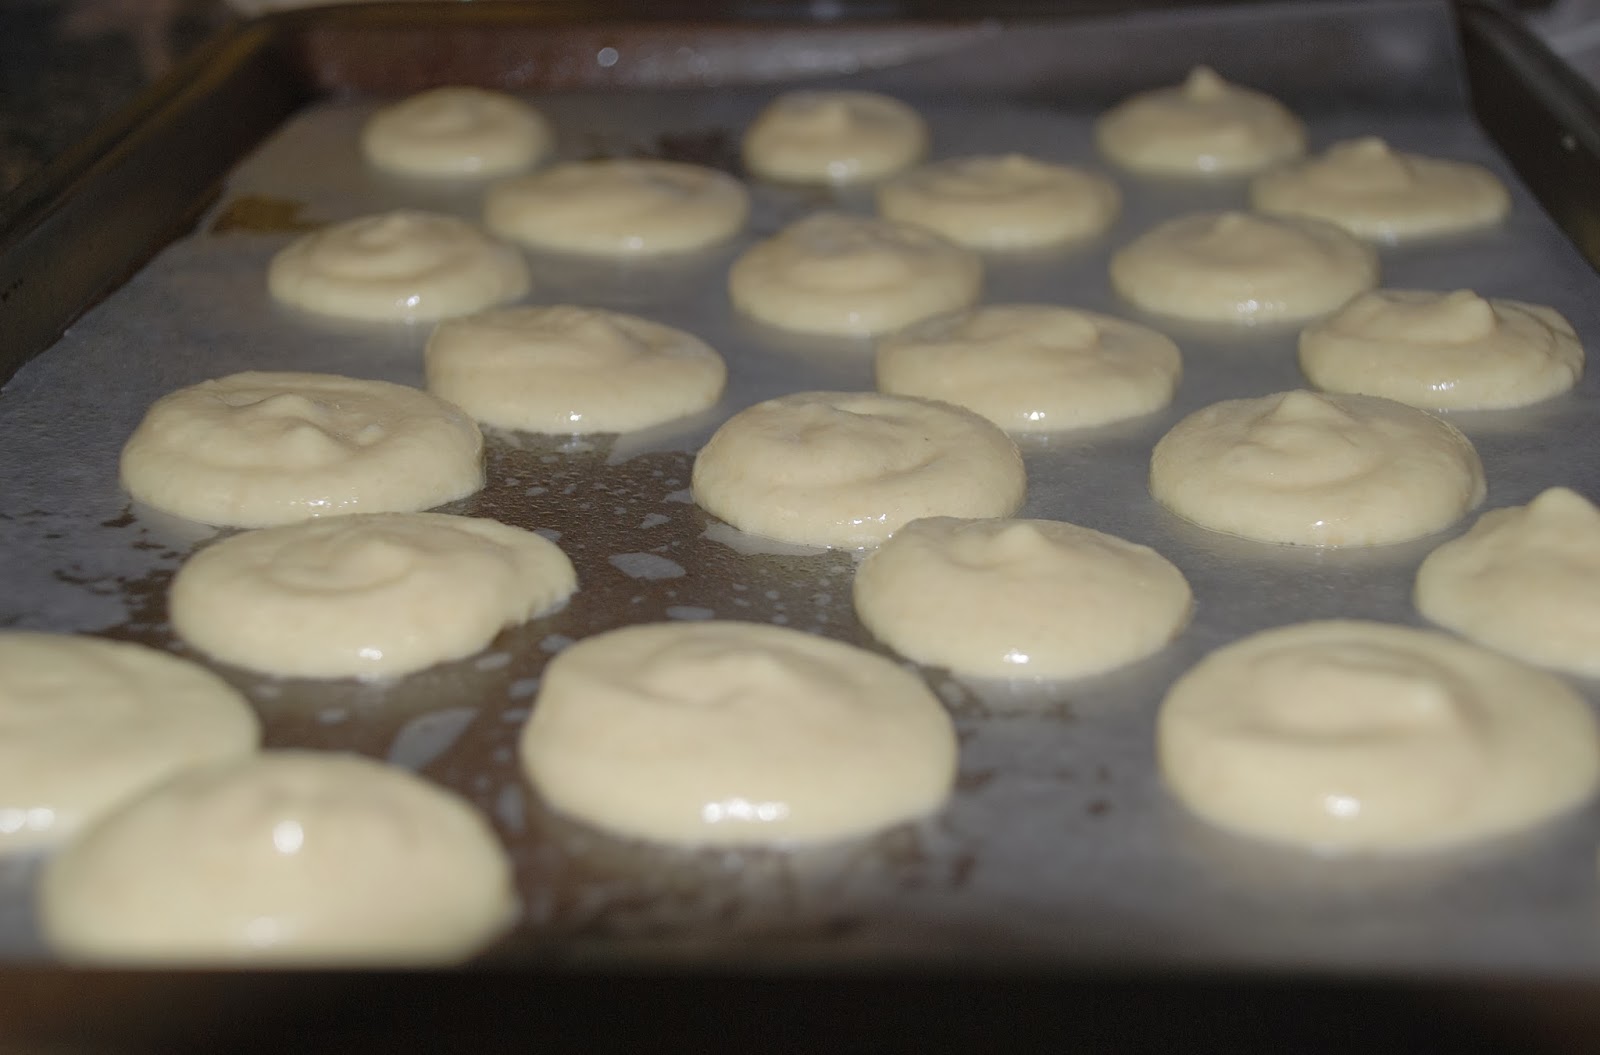
15. Next you will want to tap the cookie sheet 2-3 times on the counter turning and repeating on all four sides. This will release the air bubbles and help your cookies to to lay evenly.
16. If you notice any air bubbles at this time you can take a toothpick and pop them...this is also a good time to smooth out any peaks left over from your piping. The best way to do this is to wet your finger or the back of a spoon and smooth out the tops. NOTE: This batch was slightly under mixed and you should not have too much to smooth out as the batter should settle itself...sigh...

You can see the peaks are gone but I should have smoothed the circles out too...just to have a smooth uniform look
17. Now...you wait. Yes I know...you have already waited SO long and you are SO close. You are wanting your cookies to form a thin "shell", where when you touch them nothing comes off on your finger. This will help in producing the "feet" (that little crinkly part of the bottom of perfect macarons). This could take 15 min or 2 hours or sometimes more. This is why you want to avoid baking these while it's raining outside. The added humidity increases the amount of time it takes for the cookies to set.


18. Preheat your oven to 290 and make sure your rack is placed in the middle of the oven. (There is some debate on oven temps...some recipes call for you to bake them at a higher temp for a few minutes then lower the temp...I do not do this)
19. Place in ONE of your cookie sheets...They bake better one at a time. Bake cookies 16-20 min.
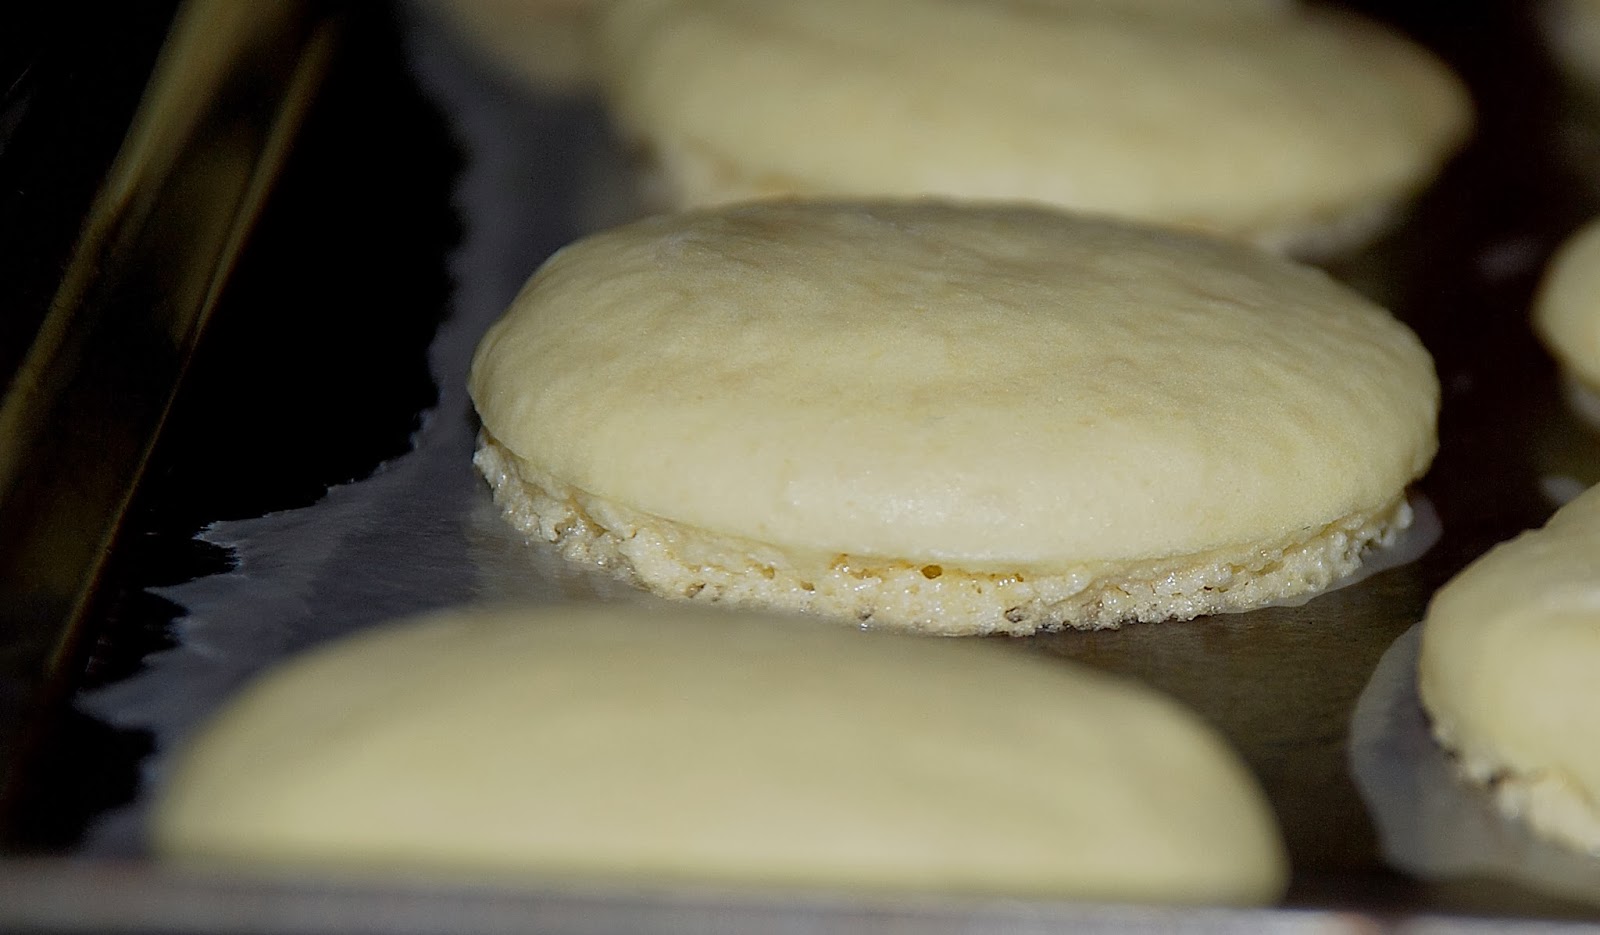
LOOK FEET!!!
20. When the cookies come out of the oven, you will wait...again. Allow them to cool completely before removing them from the pan. If your cookies are trying to stick a bit, you can add a small amt of water under the wax paper, wait about 20-30 seconds and they come right off. The idea is to wet the paper, NOT the cookies, so don't wait too long after adding the water.

21. For these lemon macarons I just added a little lemon curd for the filling. If you have used a template or if you are skilled at piping, all your macarons should be the same size. Match them together, add in your filling on one side and sandwich the second cookie on top. Place the macarons in the fridge for 1-4 days.

Look almost no feet at all on these! :( I wasn't patient enough to let them set properly. The ones in the middle were not done setting yet...and they are a bit under mixed!)

Placing them in the fridge allows the filling to soak into the cookie making them moist and delicious! (Although I ALWAYS eat one or 2 before doing this...can't help myself!)


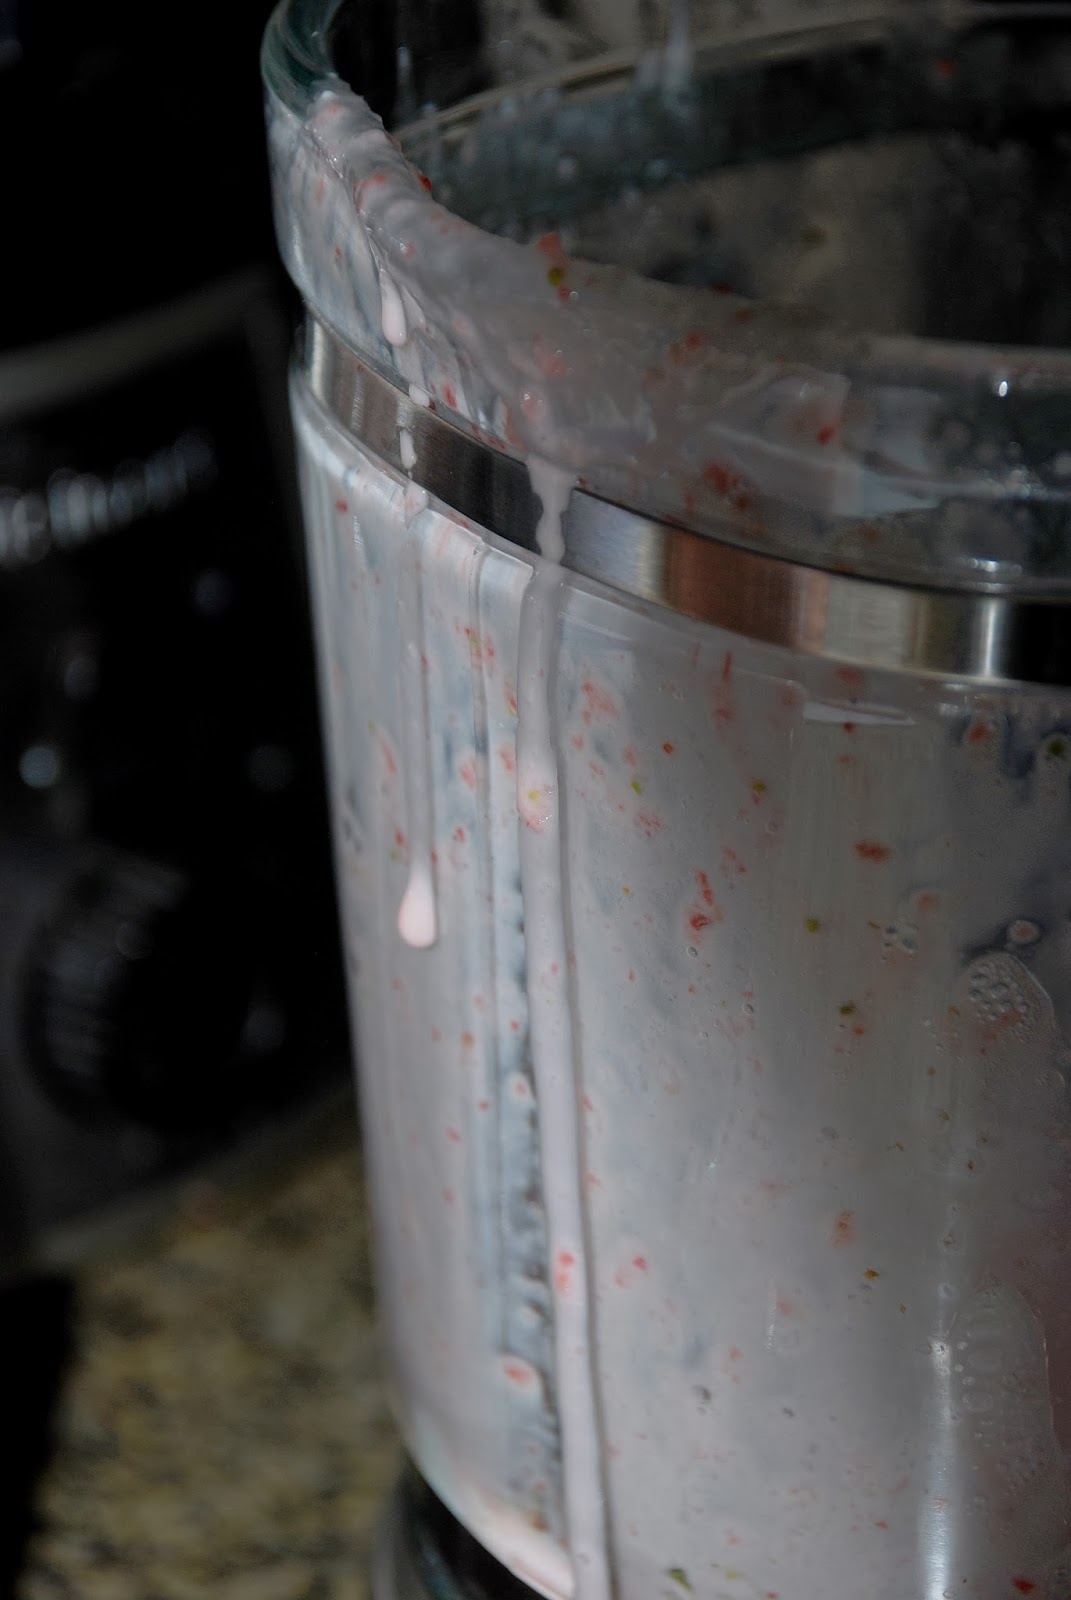
This was my first batch...Strawberry (Pink cookie with strawberry buttercream filling)...and while I liked the lemon better with the tart curd, I think the actual macaron turned out better than the second batch...It had better feet!
It's a work in progress!

This was from my first batch...see what happens when it's not mixed properly! Luckily I was able to save them!
NOTE: If you macarons seem perfect but are hollow try turning your oven temp up 10-20 degrees on the next batch and see if that helps!